DA230459
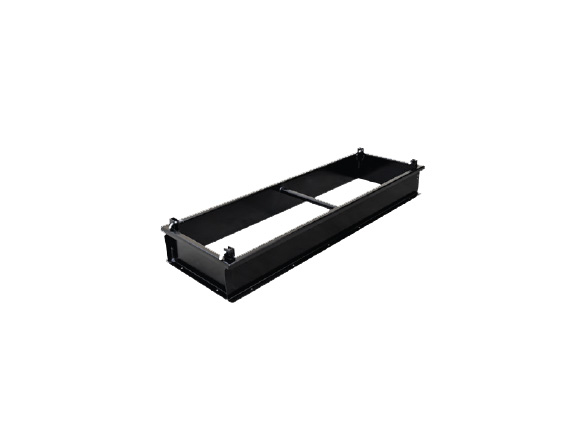
Danuser MAC Bucket Hopper Extension | Extends Capacity From 1/2 Yard To 3/4 | Includes Hardware
$650.00
Weight: 85lbs
Assembly & Installation
Recommended Tools & Materials
• 1/2” wrench
• 1/2” socket
• Ratchet
• Vise grips
• Hammer
• Caulk gun
• General purpose silicone caulk
STEP 1: Park the vehicle on level ground, and rest the MAC Bucket on a solid, level surface.
STEP 2: Shut off the vehicle, and relieve all hydraulic pressure.
STEP 3: Remove packing material from the hopper extension.
STEP 4: Disengage the four (4) hinge pins, and remove the safety grate:
A: Turn Pins Upward
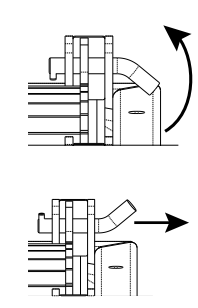
B: Pull Pins
C: Turn Pins Downward
D: Remove Safety Grate
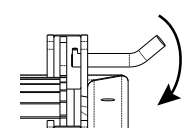
STEP 5: Relocate the safety grate atop the hopper extension, and secure with the hopper extension hinge pins.
STEP 6: Using a pair of vise grips and a hammer, remove the roll pins from all four (4) MAC Bucket hinge pins. Remove the hinge pins and discard.
STEP 7: Clean the top flange of the MAC Bucket.
STEP 8: Run a small bead of silicone caulk on the top flange of the MAC Bucket to create a watertight seal between the MAC Bucket and the hopper extension.
STEP 9: With the help of a second person, position the hopper extension onto the MAC Bucket.
STEP 10: Using the hardware provided, install the bolts, washers, and nuts. Leave handtight until all 16 bolts are installed.
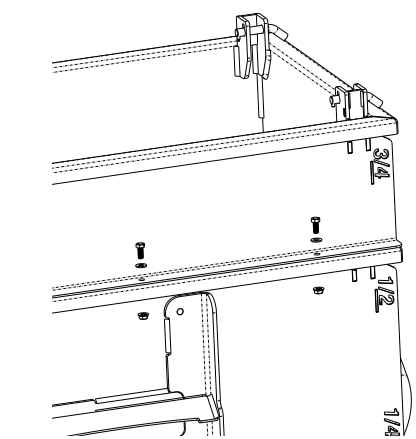
STEP 11: Using a 1/2” wrench and ratchet with a 1/2” socket, tighten all 16 bolts and nuts.
| Weight | 85 lbs |
|---|