WFA532RD
Westfield 10″ Electric Hopper Winch | For MK/MKX/MKX2-100’s WITHOUT Electric Powerswing
$2,833.00
WFA532RD Applicable To 10” Auger Series Without Electric Powerswing
Steps For Standalone Kit Installation-
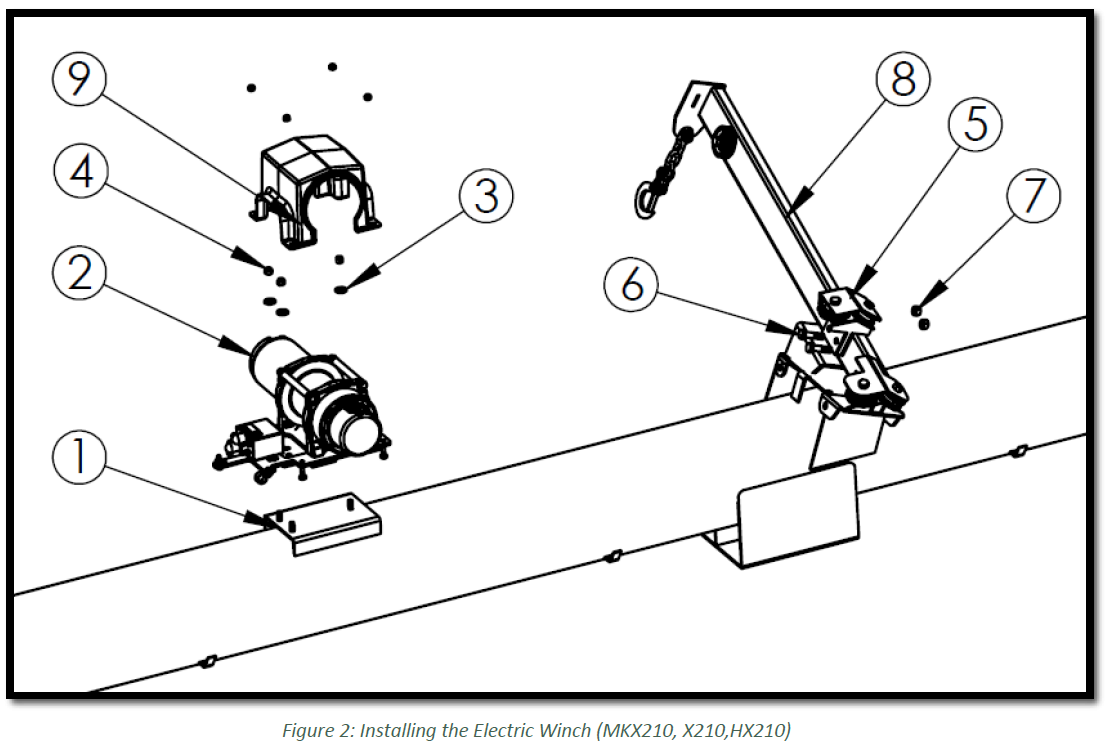
Step 1: Install the Electric Winch
- Install the pulley guide onto the lift arm (see Figure 2). Remove winch guard before installing winch onto mounting plate. Ensure that the winch cable (not shown) feeds through the two lift arm pulleys (at the top of the lift arm and at the pulley guide).
| 1 | Winch mounting plate | 5 | Pulley guide |
| 2 | Electric Winch | 6 | Bolt, ½” X 2-1/2” |
| 3 | Flat washer, 3/8” | 7 | Locknut, ½” |
| 4 | Locknut, 3/8” | 8 | Lift Arm |
| 9 | Winch Guard | ||
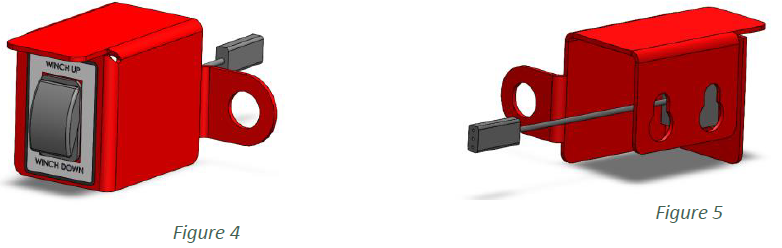
Step 2: Mount electric winch switch bracket assembly (203546) onto boot as shown in Figure 6. This switch in Figure 4 can manually lift winch “UP” and “Down”.
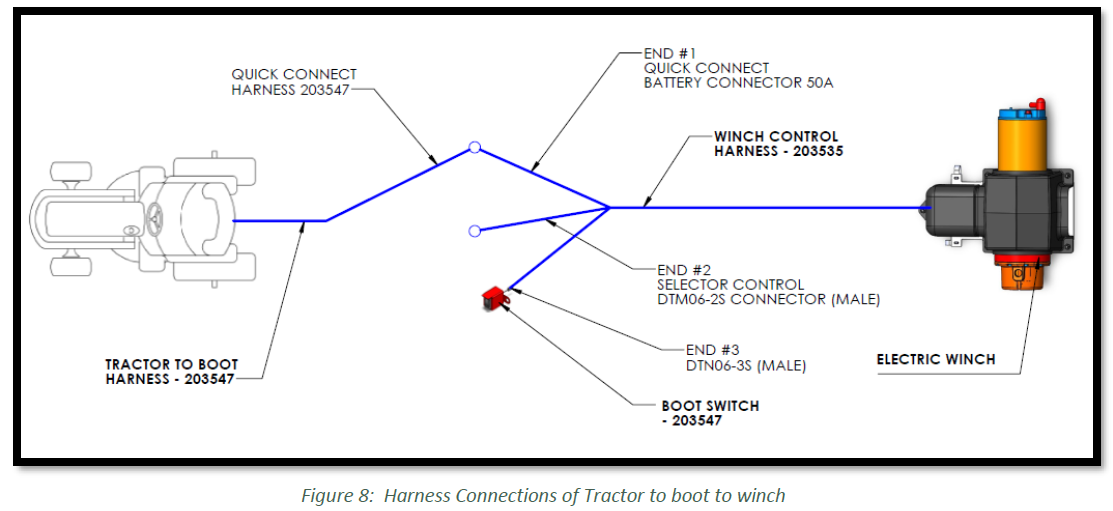
Step 3: Route the winch control harness (203535) to the boot as shown in Figure 6 and connect it to tractor harness and boot switch as shown in Figure 7 & Figure 8. Fasten Harnesses to cable clamps after connecting.

Step 4: Battery connections (Tractor Harness)
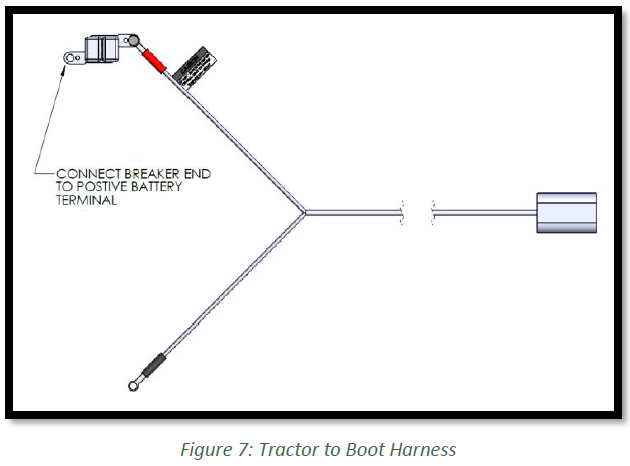
- For Tractor to boot harness (203547) as labelled, connect the end opposite the quick – connect to the battery and chassis ground:
- Attach the positive wire directly to the positive terminal on the tractor battery (the positive wire has a circuit breaker on it) as shown in Figure 7
- Attach negative wire to tractor chassis ground point (assuming that the tractor battery is also grounded to the chassis).
Caution: If these electrical cables are not hooked up properly the electric controller will be damaged.
Step 5: Harness connections for Standalone kits:
A. Attach tractor wire harness (203547) quick connect to the winch control harness (203535) quick connect battery connector 50A (labelled as END #1) as shown in Figure 8.
B. Connect quick connect of E-winch switch assembly (203546) on the boot to END#3 of winch control harness (203535) as shown in Figure 8.